I sometimes get asked if I can build a contraption that pushes data from a sensor out to a computer so that they make some video, sound or something. Things like interactive Ouija tables, wearable accelerometers or projection mapped rooms.
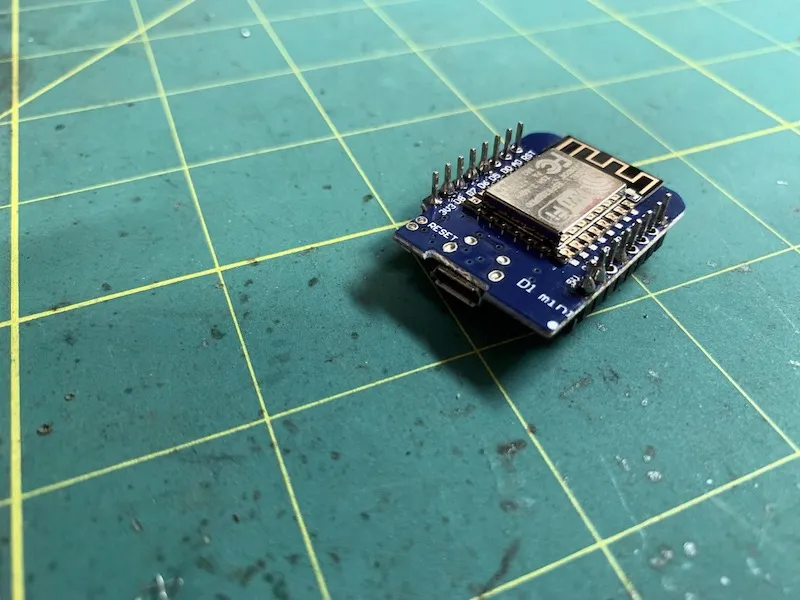
I’ve become a huge fan of the ESP8266 powered D1 Mini for this sort of work. It’s small size and low power usage makes it ideal for wearable applications. Many of the sensors and libraries that work with an Arduino are also compatible with the D1, plus the Mini has built-in WiFi. The only real care you need to take when ordering is to make sure you get the ‘pro’ version. They are pretty much the same price, but come with an external antenna connector. The D1’s onboard antenna isn’t very strong, and having the option to add an external antenna for situations where you need that extra bit of range or signal strength is a huge win.

Open Sound Control (OSC) originated from UC Berkeley Center for New Music and Audio Technology in 1997. Since then it has become a popular protocol for communicating between different pieces of software and hardware for generating sound and video. Many of the established procedural tools have support for OSC, things like Max, Isadora and Qlab.
Open Sound Control messages are sent across networks via the User Datagram Protocol (UDP). It’s a sensible choice, as UDP is great for time-sensitive applications, where you want stuff to happen right now. It’s what most video games use to communicate:
‘Dear Game Server, I have shot the monster. Yours sincerely, My Computer.’
UDP gets messages sent quickly by doing away error checking and correction. You have no guarantee that your message will be received, or that they will arrive in the same order that they were sent. Most of the time this isn’t as big a deal as it may appear, but how much of a deal will depend on the reliability of your network connection.
Sending OSC messages from the D1 mini is a dream with the OSC library that also comes from Berkeley:
#include <Arduino.h>
#include <ESP8266WiFi.h>
#include <WiFiUdp.h>
#include <OSCMessage.h>

WiFiUDP Udp;

const char* ssid = "****";           // EditThis: The name of your WiFi access point.
const char* password = "****";       // EditThis: The password of your WiFi access point.
const IPAddress dstIp(10,1,0,3);     // EditThis: The destination for OSC messages.
const unsigned int dstPort = 53000;  // EditThis: The destination port for OSC messages.
const unsigned int localPort = 8765; // EditThis: The local port listening for inbound OSC.

// setup executes once after booting. It configures the underlying hardware for
// use in the main loop.
void setup() {
    Serial.begin(9600);

    Serial.print("Connecting WiFi ");
    // Prevent need for powercyle after upload.
      WiFi.disconnect();

      // Use DHCP to connect and obtain IP Address.
      WiFi.mode(WIFI_STA);
      WiFi.begin(ssid, password);

      // Wait until we have connected to the WiFi AP.
      while (WiFi.status() != WL_CONNECTED) {
        delay(500);
        Serial.print(".");
    }
    Serial.println("Done!");

    Udp.begin(localPort);
}

// loop is called continously untill the microcontroller is reset.
void loop() {
    OSCMessage msg("/hello");
    Udp.beginPacket(dstIp, dstPort);
    msg.send(Udp);
    Udp.endPacket();
    msg.empty();

    delay(500);
}
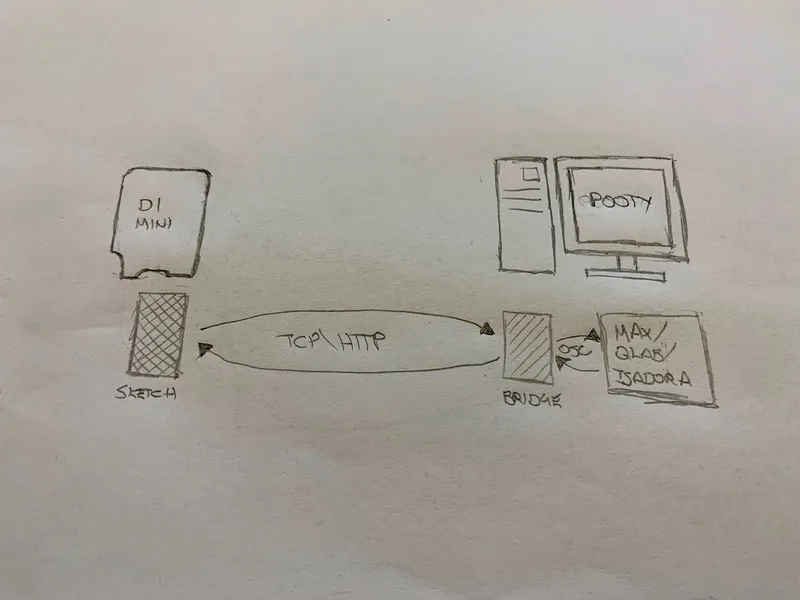
Remember that small onboard antenna built into the D1 mini? This is the point where it may bite you on the arse. You might find yourself in a situation where the reliability of your network connection isn’t the greatest. In this case, I often prefer to use the Transmission Control Protocol (TCP), which comes chock-filled with error correcting goodness. The messages won’t be transmitted as quickly, but they will make it across a rough network connection. The code running on the D1 Mini becomes something like:
#include <Arduino.h>
#include <ESP8266WiFi.h>
#include <ESP8266HTTPClient.h>

const char* ssid = "****";           // EditThis: The name of your WiFi access point.
const char* password = "****";       // EditThis: The password of your WiFi access point.

// setup executes once after booting. It configures the underlying hardware for
// use in the main loop.
void setup() {
	Serial.begin(9600);

	Serial.print("Connecting WiFi ");
	// Prevent need for powercyle after upload.
  	WiFi.disconnect();

  	// Use DHCP to connect and obtain IP Address.
  	WiFi.mode(WIFI_STA);
  	WiFi.begin(ssid, password);

  	// Wait until we have connected to the WiFi AP.
  	while (WiFi.status() != WL_CONNECTED) {
		delay(500);
		Serial.print(".");
	}
	Serial.println("Done!");
}

void loop() {
    HTTPClient http;

    http.begin("http://10.1.0.3:8080/hello");  //Specify request destination
    http.GET();
    http.end();

    delay(500);
}
However we need to create a bridge application to translate our messages to OSC. I like to run the bridge application on the same machine that is running max/isadora/qlab, you won’t have any network issues (the messages are being sent and received on the same machine) and it gives max/isadora/qlab the possibility of starting and stopping the bridge application.

I usually knock these sorts of bridge applications up with Go, it is pretty straight forward with the excellent OSC library from ‘hypebeast’
package main

import (
	"fmt"
	"github.com/hypebeast/go-osc/osc"
	"log"
	"net/http"
)

func main() {
	log.Println("Starting OSC-TEST-SERVER")

	log.Println("Creating endpoint: '/hello'")
	http.HandleFunc("/hello", func(w http.ResponseWriter, r *http.Request) {
		fmt.Fprintf(w, "OK")

		client := osc.NewClient("localhost", 53000)
		msg := osc.NewMessage("/hello")
		client.Send(msg)
		log.Println("Sent OSC '/hello'")
	})

	log.Fatal(http.ListenAndServe(":8080", nil))
}
OSC has standardised how to communicate with a whole host of creative software in real-time. Plus the software and hardware support for teaching really small devices how to speak OSC has matured a ton over the last few years. I always relax a bit when I hear that the thing that the hardware I’m crafting needs to talk OSC. At least that bit should be fairly straight forward.
Oh and before I go, osculator is a great tool that I use all the time to help ensure that the OSC messages I am generating are correctly formatted.
Comments:
You can join the conversation on Twitter or Instagram
Become a Patreon to get early and behind-the-scenes access along with email notifications for each new post.
Hi! Subconsciously you already know this, but let's make it obvious. Hopefully this article was helpful. You might also find yourself following a link to Amazon to learn more about parts or equipment. If you end up placing an order, I make a couple of dollarydoos. We aren't talking a rapper lifestyle of supercars and yachts, but it does help pay for the stuff you see here. So to everyone that supports this place - thank you.
