I develop for a bunch of different platforms and devices. So I have a whole stack of different programming languages, SDK’s and IDE’s kicking around. This ends up being a huge pain in the ass to maintain. Try to temporarily use a different machine, or even worse. Upgrade? It is a constant download and configuration nightmare. I had a few of the ‘big environments’ all setup using vagrant which was great. But when I got my latest machine. It was going to be different. All my development environments were going to be defined as docker containers. ALL OF THEM. Even Arduino. This is the story of how I ‘deploy docker containers’ from OSX to Arduino boards.
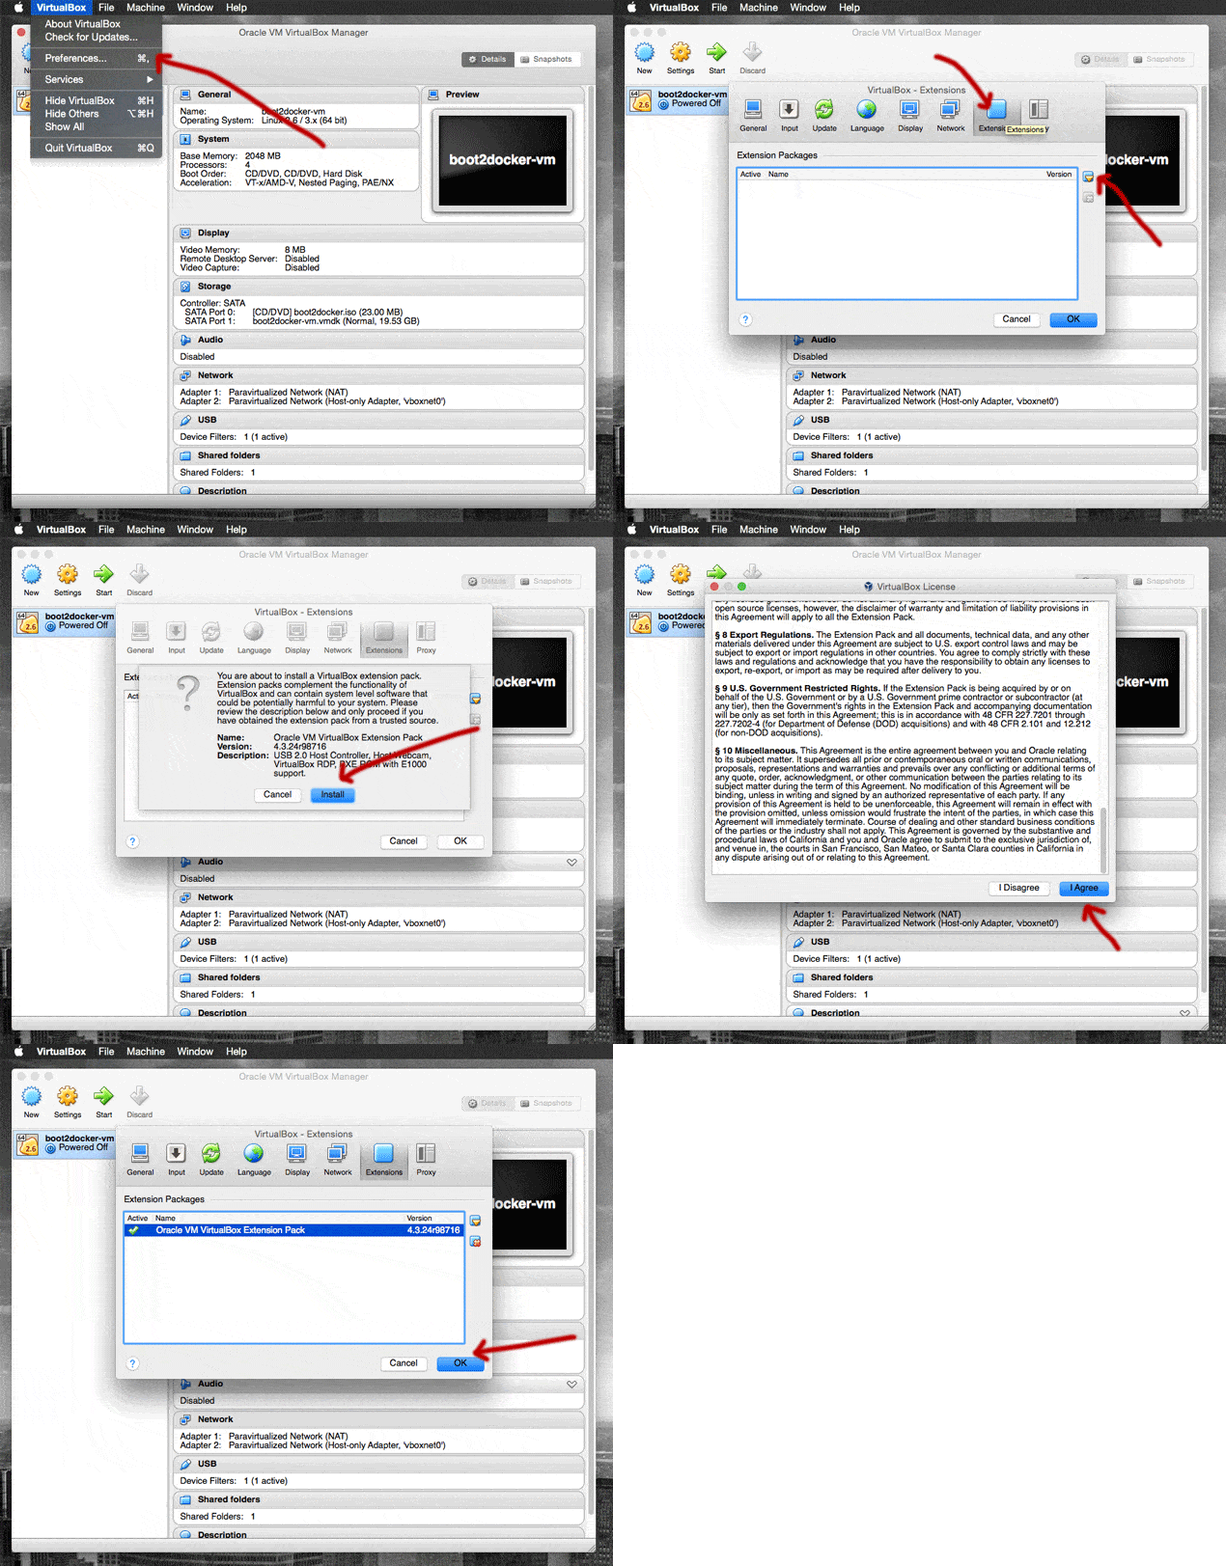
After downloading and installing Boot2Docker, you need to install the VirtualBox extension pack. This extension adds the USB support that lets you share USB devices (like your Arduino) with virtual machines:
- Download the extension pack.
- Open up the VirtualBox GUI.
- Select ‘VirtualBox -> Preferences’ from the menu.
- Select the ‘Extensions’ icon.
- Press the funny lookin' ‘yellow square superimposed on the blue box’ button.
- Browse to your downloaded extension pack, and press open.

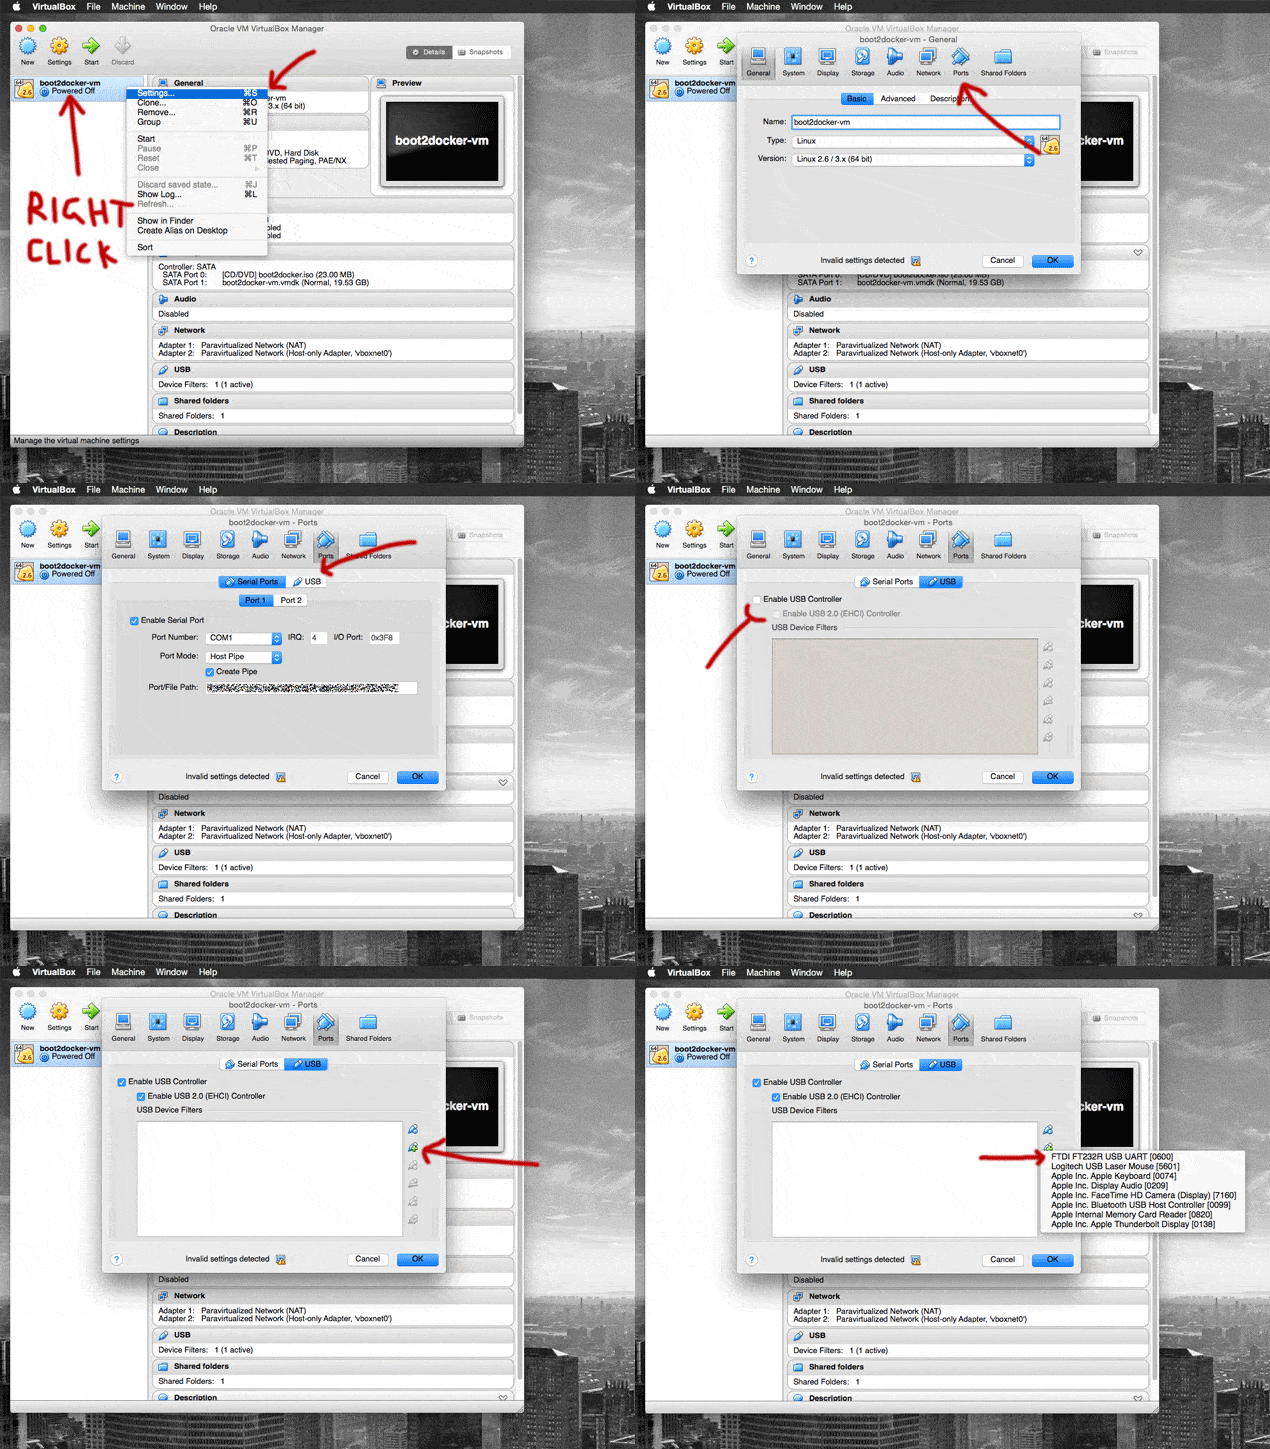
Next we need to give Boot2Docker access to Arduino boards that you plug into your host machine.
- Plug your arduino into an available USB slot.
- Make sure the boot2docker-vm is not running.
- Right click on the boot2docker-vm and select ‘Settings…’
- Select the ‘Ports’ icon.
- Select the ‘USB’ tab.
- Make sure both ‘Enable USB Controller’ and ‘Enable USB 2.0 (EHCI) Controller’ is checked.
- Press the ‘green plus superimposed on blue USB plug’ button.
- Select the Arduino device from the list ‘FTDI FT232R USB UART’.
- Hit OK.

Alright. Now VirtualBox is all configured to enable docker to access our Arduino. Time to roll a docker image that can punch containers into our Arduino. Well kind of. Docker won’t be running a container on the arduino. Running the container will just upload your sketch. For the image, I’m going to use ino. The latest versions of Arduino are starting to include its own official CLI. But at the time of writting it did not include a serial monitor, nor would it work headless (the CLI still needs a full X11 stack).
Your Arduino project needs to be in an inotool format and also contain the Arduino Dockerfile:
.
├── Dockerfile
├── lib
└── src
    └── sketch.ino
OK, with all that in place. It is time to build your image.
$ docker build -t your-arduino-project .
You can now ‘spin up a container’ on your Arduino.
$ docker run --privileged -v /dev/bus/usb:/dev/bus/usb your-arduino-project ino upload -m mega2560
Finally. Liberated from the blue Arduino IDE. Sorry Arduino. I love your microcontrollers. The IDE? Not so much.

Edits:
- 2015/04/10 - Miscellaneous typos.
Comments:
You can join the conversation on Twitter or Instagram
Become a Patreon to get early and behind-the-scenes access along with email notifications for each new post.
Hi! Subconsciously you already know this, but let's make it obvious. Hopefully this article was helpful. You might also find yourself following a link to Amazon to learn more about parts or equipment. If you end up placing an order, I make a couple of dollarydoos. We aren't talking a rapper lifestyle of supercars and yachts, but it does help pay for the stuff you see here. So to everyone that supports this place - thank you.
