So your past the painful phase of 3D printing balls of spaghetti and you are starting to get print shapes that are starting to look like they should. The only problem, they are not quite right. Holes that are supposed to be perfectly circular are turning out more like ovals. This is often a sign that firmware in your 3D printer needs a bit of calibration.
Another common scale calibration problem is when your z-axis won’t move any further than tiny 0.1mm jumps. Trying to step your z-axis, in say 10mm, results in a horrible buzzing sound and no movement.
Both oval printing problem and nasty stepper buzzing sound can be fixed by a little bit of calibration. Before we get started, the following guide assumes you know how to configure and upload updated firmware to your 3D printer, if not this handy guide will help get you started. You will also need a pair of digital vernier callipers, even these cheap Neiko ones for $16 from Amazon are awesome and you will use them all the time when you are working with your 3D printer.
It is weird, before you get into 3D printing, a millimetre seems like such a tiny unit of measurement. Then as the pursuit for better and better 3D prints starts to kick in, a millimetre suddenly starts to feel more like a kilometre. Seriously, $16 on a pair of digital vernier callipers is going to save you a ton of time measuring stuff down the track.
So here is my super fast, two step guide to calibrating the scale of a 3D printer.
The first calibration pass is done just by taking measurements with your callipers. This will save you a ton of time, as printing calibration objects over and over again will have you waiting around for up to an hour just to test a small change. So the more time you spend in this first phase getting things right is going to mean big time savings in the second phase.
On each axis, you are going to lay your callipers down on the smooth bar like in the picture shown.
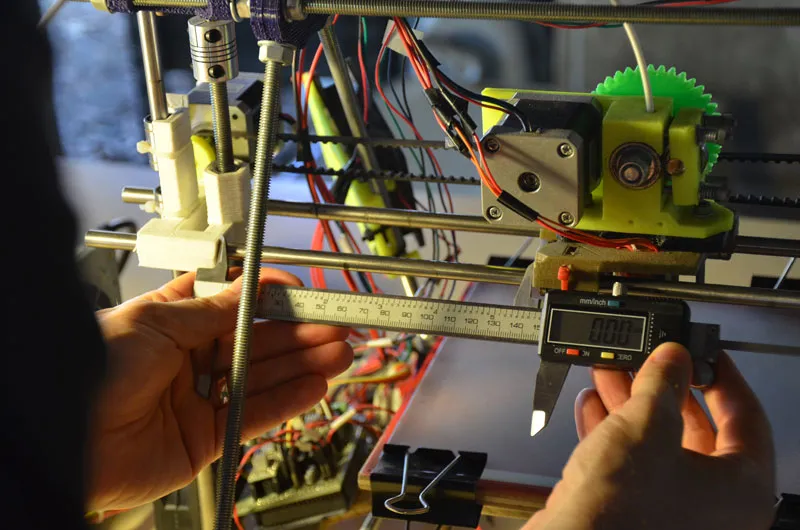
Next, zero out your callipers so that when moving your printer, you are going to get a nice and easy reading. From here you want to use your printer controller (like pronterface) to squeeze the callipers shut, remembering to keep track of how far you think you have moved the axis. I.e. If you step your printer seven times, by 10mm along the x-axis - you should have moved the printhead 70mm along the x-axis. To maximise the error reading, you also want to do this over the longest possible length you can.
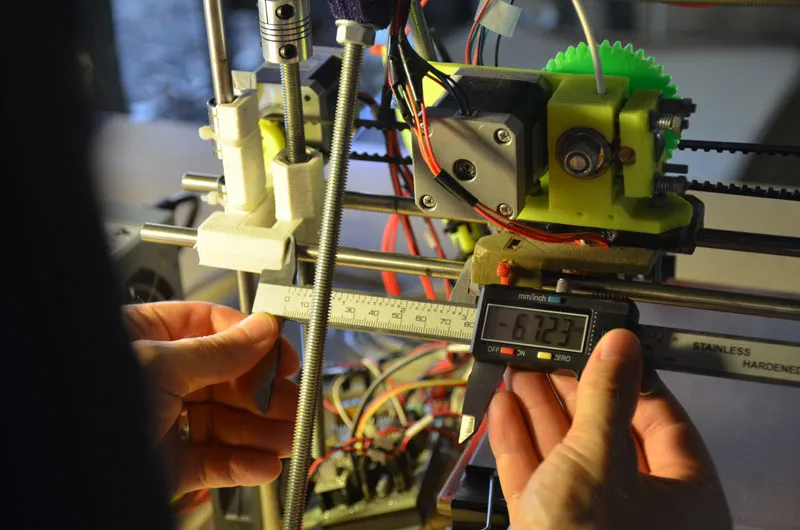
Now, write down the measurement from your callipers, (in our example 67.22mm). Ok, so now we know exactly how far out of whack our x-axis is. Open up the configuration.h file of your firmware, looking for the line that reads something like (the actual numbers will vary):

Each of these numbers represent the number of steps the stepper needs to make to move the X, Y, Z and E axis one millimetre. So taking the x-axis:

Update your configuration.h with the new reading

Repeat this process for each axis, and then upload your firmware. Now go back, and remeasure with the callipers. Performing the same update if necessary. The more accurate, and repeatable you get this first phase, will make the second phase much quicker.
The second phase of the calibration process is to print a calibration object, there are a heap of these on thingiverse, and here is yet another calibration object (yaco). You will notice that each end of the calibration object is labelled with the axis. Trust me, nothing worse than spending up to an hour printing a calibration object, taking it off the build platform to measure and loosing track of which side belongs to which axis. With yaco, at least you know that each axis should be exactly 60mm long.
Measure up each axis with your callipers and use the same formula as above to refine your steps per millimetre settings as necessary. Reprint and your 3D printer should now have the perfect scale for each axis.
Hi! Subconsciously you already know this, but let's make it obvious. Hopefully this article was helpful. You might also find yourself following a link to Amazon to learn more about parts or equipment. If you end up placing an order, I make a couple of dollarydoos. We aren't talking a rapper lifestyle of supercars and yachts, but it does help pay for the stuff you see here. So to everyone that supports this place - thank you.