
So I’m about to embark on a decent sized 3D printing run, and wanted to squeeze even more performance out of my heated build platform.
In the past I have explored using an insulator on top of the heated build platform to improve warm times by around 10%. But that wasn’t enough, I wanted my heated build platform to reach temperature faster!
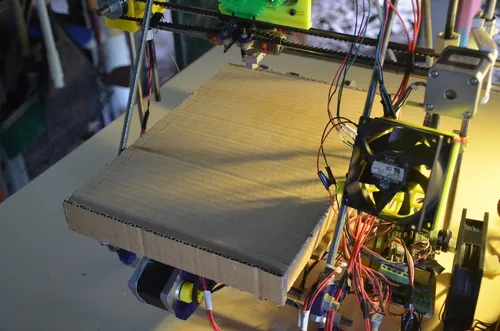
So I constructed my build surface from three layers. Glass, PCB heatbed, and plywood. I want to get the heat from the PCB into the glass as fast as possible. Putting an insulator below the PCB (plywood), and on top of the glass (heated build platform cosy) was a decent start.

In my PC overclocking days, I wanted to get heat out of the CPU in my computer and into the heat-sink on top as efficiently as possible. I used a thermal grease called ‘Arctic Silver’, which was the bee knees at the time. This paste squashed out tiny microscopic pockets of air trapped between the heat-sink and CPU. Making for a better contact and greater conduction of heat. Theory was, this should also get the heat out of the PCB and into the glass faster.

I grabbed a tube of Arctic Silver, removed the glass from my build platform and started applying. It was much harder applying the paste evenly over such a large surface. Using a business card, I worked in different areas, building it up till I had the whole PCB covered. I then followed a similar process on the bottom of the glass. Finally I used clamps to squish the two back together (bulldog clips didn’t apply enough pressure). After a few minutes, I removed the clamps.
Phew. Time to heat this puppy up, and test. You know what? It actually made things worse. I wasn’t happy with the bond between the two surfaces, so I tried again. Removing some of the excess paste with a lint free cloth and clamping again. A little better, but still worse than no paste at all (I used a similar test procedure to the insulator test).

I’m still a bit confused by this. It should be as good, if not a little better with the paste. You are much better off starting with decent insulators above the glass, and below the PCB. As for why the paste didn’t improve things further, I have a couple of ideas:
- Arctic Silver has a 200 hour ‘break in period’, it takes up to 200 hours for thermal conductivity to reach its maximum. Arctic Silver now also sell a modern alternative ‘Céramique 2’. It only has a 25 hour break in time, and is also much cheaper (contains no silver). The break in times might be longer for such a large surface area, so the Céramique might offer better performance.
- The thermistor touching the bottom of the glass surface might not be giving an accurate reading of glass temperature. I want to get one of those infrared thermometers to check temperature readings.
- Maybe I still haven’t got the application of thermal paste correct. Perhaps the layer is too thick, and I have air bubbles still trapped inside.
Comments:
You can join the conversation on Twitter or Instagram
Become a Patreon to get early and behind-the-scenes access along with email notifications for each new post.
Hi! Subconsciously you already know this, but let's make it obvious. Hopefully this article was helpful. You might also find yourself following a link to Amazon to learn more about parts or equipment. If you end up placing an order, I make a couple of dollarydoos. We aren't talking a rapper lifestyle of supercars and yachts, but it does help pay for the stuff you see here. So to everyone that supports this place - thank you.